



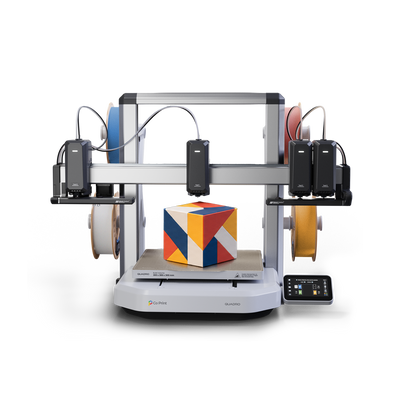
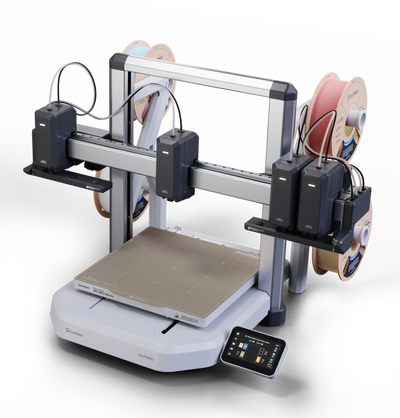


In the second article of our Progress Update series, where we share Quadro’s development process step by step, we are very excited to share important new developments with you.
In our previous update, we announced that the molds for the aluminum extrusion parts to be used in Quadro had been completed. We also shared detailed information about QuadrOS, the operating system that powers Quadro. Together, we took a closer look at QuadrOS’s interface structure, filament management system, automatic calibration steps, and the core logic designed to manage four toolheads in sync.
In this update, we would like to share that the Quadro development project is moving forward at a strong pace and is getting closer to the final stages before production.
In this article, you will see Quadro’s first working prototype and witness its first four-color print test process up close. We will also be sharing important details such as print speed, color transitions, cleaning efficiency, system stability, and the initial performance data we have gathered during the development process.
In our previous Progress Update, we stated that we wanted to see you not only as users following the process, but also as a community directly contributing to Quadro’s development. Your comments, suggestions, and feedback have been extremely valuable to us throughout this process.
We reviewed many of the suggestions you shared with us and included a significant portion of them in Quadro’s development process. Some features have already been directly added to the printer, while others have been included in our development roadmap and are planned to be integrated into the system in the upcoming stages.
In this article, we will share the new features shaped by user feedback, the improvements made on the prototype, and the latest stage Quadro has reached before production.
Now, let’s take a closer look at one of the most exciting stages in the development journey of Co Print Quadro.
1. Community Feedback Turns into Product Improvements
Some of the features added based on your requests are as follows:
1.1 Skip Object Feature
The Skip Object feature has been added to QuadrOS. With this feature, failed parts in multi-object prints can be individually canceled while the rest of the print continues.
1.2 Advanced Camera System
Taking into account the requests we received regarding the camera system, we selected a high-resolution, wide-angle camera. This allows both the print bed and the cleaning area to be monitored easily.
1.3 Open-Source and Community-Friendly Software
Many users pointed out that excessive customization made by some companies on Klipper and OrcaSlicer can reduce ease of use and disconnect users from community updates. We take this feedback very seriously.
In this direction, we would especially like to state that our software will be open-source.
QuadrOS will directly use the Klipper infrastructure and will continue to receive updates from the Klipper ecosystem. At the same time, custom interface improvements designed to enhance the user experience for Quadro’s unique architecture and additional functions will also be included in the system.
We are following the same approach on the OrcaSlicer side. While preserving the core structure, we will only provide additional features required specifically for Quadro.
1.4 Smart Maintenance Management
We are developing a new system within QuadrOS that centrally manages the printer’s maintenance processes.
Nozzle replacement reminders
Axis lubrication alerts
Periodic maintenance tracking
Instant access to Step-by-step guidance via QR code
With this system, users will be able to perform many maintenance operations directly through the printer screen.
1.5 Build Volume
Based on the feedback we received from you, we designed Quadro with a build volume of 300 x 300 x 300 mm. This allows Quadro to stand one step ahead of similar competitors in terms of print area.
2. Mechanical Structure
For Quadro’s critical components that require high rigidity, precision, and excellent flatness — such as the Z towers, main frame, Y bed assembly, X axis, and the carrier rails for the toolheads — we chose durable aluminum parts produced with aluminum injection molding technology instead of manufacturing methods such as laser cutting and bending, which can introduce higher tolerances and potential inaccuracies.
This approach allows us to achieve an extremely rigid structure that minimizes vibration, while also providing superior precision in areas where flatness is critical, especially the print bed.
3. Qdock Station: Clean Nozzle System
Quadro features specially designed smart parking stations on both the right and left sides of the X axis for its toolheads. These stations clean the nozzles of inactive toolheads, keep their tips sealed, and ensure they remain ready for the next color change.
Once a toolhead completes its print task, it moves to the right or left parking station depending on its position. There, the nozzle is cleaned first. After the cleaning process, the nozzle tip is sealed, and the toolhead is cooled down to approximately 175°C before entering standby mode.
To reduce waiting time during color changes, Quadro prepares the next toolhead before it is needed. The corresponding nozzle is automatically activated approximately 30 seconds before use and heated to printing temperature. This way, the print does not need to pause while the nozzle heats up; when the toolhead becomes active, the system can perform the color change quickly and seamlessly.
This smart parking and preheating system accelerates color transitions in Quadro’s multi-toolhead architecture while also helping reduce filament leakage, nozzle contamination, and unwanted marks on the print surface.
Additionally, a wide-angle camera is positioned in the right-side parking area. With this camera, users can monitor both the print bed and the cleaning area from a wider perspective, allowing for more controlled print supervision.
4. Quadro 360° Calibration System
Quadro’s four independent toolheads must align to the same reference point after each color change and continue printing from the exact point where the print left off. In multi-toolhead printing systems, this alignment is one of the most critical factors directly affecting print quality.
In mechanical systems, micron-level positional differences can occur between each toolhead due to assembly tolerances, manufacturing variations, and part positioning. If these differences are not properly calibrated, alignment issues during color transitions and inconsistencies in print details may occur.
For this reason, we developed a dedicated 360° calibration system for Quadro. This system precisely measures and calculates the positional differences of each toolhead and compensates for them through software. As a result, four independent toolheads can operate in sync as a single unified system throughout the print process.
The calibration process begins with the T0 toolhead and continues sequentially with all toolheads moving to the dedicated calibration area located at the rear-right section of the print bed. Each toolhead touches the calibration rod twice from five contact points: left, right, front, rear, and top, collecting positional data from each direction.
During this process, the measurements taken from the T0 toolhead are accepted as the reference data. Then, the T1, T2, and T3 toolheads repeat the same calibration steps. The values obtained from each toolhead are compared against the T0 reference, and the positional differences between them are calculated with high precision.
These calculated differences are automatically processed by the software, creating separate alignment values for each toolhead. This allows positional deviations caused by mechanical tolerances to be compensated through software, enabling all toolheads to operate in sync based on the same reference point.
5. First 4-Color Print Test
As part of Quadro’s development process, many prototypes have been produced to date. These prototypes are currently being actively used in various test processes, including mechanical performance, software stability, long-term durability, and print quality. Based on the results obtained from these tests, mechanical improvements are being made while software optimization continues in parallel.
In this update, we would like to share one of the multi-color print tests we performed with one of the prototypes currently under active testing. This gives you the opportunity to see Quadro performing a multi-color print up close for the first time.

We would like to highlight an important point: the prototype shown in the images does not represent the final production version. Since testing and revision processes are still ongoing for the aluminum parts, the final surface treatments have not yet been applied to these components. Similarly, the plastic parts are currently being produced using MJF technology for rapid prototyping purposes.
For this reason, any surface differences, gaps, part mismatches, or color variations that may be visible in the video or images will not be present in the final product. The colors, surface textures, and overall finish quality of the plastic and metal parts seen on the printer will be updated and finalized in the mass production version.
The main purpose of this test is to transparently share how Quadro’s multi-toolhead printing system, color change process, and core mechanical-software synchronization perform under real printing conditions.
5.1 Color Printing and Performance Results
Quadro completed the four-color dragon model, measuring 52 x 58 x 60 mm, in a total of 2 hours and 58 minutes, including the print preparation process. This clearly demonstrates Quadro’s speed advantage in multi-color printing.
This model was printed using standard print settings, such as a 0.4 mm nozzle and 0.2 mm layer height. Soon, we will also share detailed comparison tests of the same model printed on different printers under the same conditions.
During the test, the color change time between the two farthest-positioned toolheads was measured at only 3.7 seconds, excluding the prime tower process. When the prime tower process is included, the total color change time is approximately 8 seconds. Quadro successfully completed the dragon model with 541 color changes.
These results show that Quadro’s multi-toolhead architecture provides a significant time advantage during color change processes, positioning the system as a fast, efficient, and high-performance solution for multi-color printing.
6. Quadro StatusLight Feature
To make Quadro’s four independent toolheads easier to manage, we integrated dedicated StatusLight bars onto each toolhead. This interactive lighting system provides real-time visual feedback to the user, especially during filament loading, tool selection, and the printing process, making the overall user experience much more intuitive.
When a tool is selected from the filament selection screen, the lights on all unselected toolheads automatically turn off. Only the StatusLight on the selected toolhead remains active and is highlighted with a spotlight effect. This allows the user to clearly see which toolhead is being operated without any confusion.
This structure provides a major advantage in a system with four different toolheads and multiple filament paths. The user can directly match the tool selected on the screen with the corresponding physical toolhead on the printer. As a result, filament loading, changing, and checking processes can be performed much faster, more intuitively, and with fewer errors.
The StatusLight system does more than simply indicate tool selection. When the filament color selected from the printer screen is successfully loaded into the corresponding toolhead and detected by the filament sensor, the light bar on that toolhead automatically changes to the selected filament color.
This allows the user to track which color is loaded in each toolhead not only through the software interface, but also directly through the printer’s physical light indicators.
7. Development Progress and Kickstarter Timeline
As Quadro approaches the final stages of mechanical design, software development, and overall system validation, it will move toward mass production preparations after prototype testing and interim improvements are completed.
In the upcoming process, the design parameters will be finalized based on the data obtained from testing, mechanical and software optimizations will be completed, and plastic injection molding processes will begin.
Following these stages, Quadro is planned to be launched for pre-order through a Kickstarter campaign in Q4 2026. Our campaign’s upcoming page will also be published on Kickstarter soon and made available for you to follow.
As throughout the development process, we will continue to transparently share all new updates regarding pre-production preparations, the campaign timeline, and Quadro’s journey toward mass production.
8. Beta Program and Quadro Community
As Quadro’s development process continues to move forward, your feedback and suggestions will remain one of the most important guides for us. For this reason, we encourage you to first share your ideas, expectations, and suggestions that you believe could contribute to Quadro’s development in the comments section below this article.
Your comments will play an important role in shaping the next development steps for Quadro. In addition, to follow the process more closely, exchange ideas with our community, and stay up to date with the latest developments, we will soon activate dedicated community channels for Quadro.
In the upcoming stages, we plan to launch a beta testing process with a limited number of users. Users who want to take part in the beta test program, experience Quadro at an early stage, and contribute to the final version of the product with their feedback will be selected from our community members who have been following us and the Quadro development process from the beginning and actively contributing to its progress.
We will announce the details of the beta test program and more through our new Quadro channels on Discord, Reddit, and Facebook.
We continue to develop Co Print Quadro not only as a next-generation multi-color 3D printer, but also as a powerful, reliable, and user-focused production platform shaped together with our community.
Thank you for being a part of this journey.
For more information and further details: info@coprint3d.com


35 comments
Have reserved months ago. New to multihead printers. Would love to beta test for medical appliances I make for Oxygen patients. Would make customizing easier and comfortable for the client.
I‘m Pretty excited about hearing and especially seeing the update and current Status. I love Most of the ideas, although I would‘ve better liked Orca instead of Klipper but either way it‘s great to have that comparable print time and first quality check.
I‘m a Cluster lead and pretty deep into the market overview, seeing companies from various industries always using bambus and struggling with colour or different material, so Most interestingly would be the reliability of the mechanical system, the calibration and standard Features like vibration Checks.
Kind regards from Germany
Thanks for the update, looking forward to Kickstarter! Of course would love to beta test like everyone else. Has there been any talk about implementation of Full Spectrum Color control, like Snapmaker and Orca have done? Some very cool work being done there.
I am SUPER excited for this printer! I’ve been looking at Bambu Lab printers for a while, but was being cautious as I didn’t want to spend my money on one just yet. After learning about you guys planning to make your own printer, I jumped right in to watch this progress. Although I am VERY excited about this printer, I do have a few questions:
1. How much time will it take to set up the printer?
2. Understanding that it is open source, will the Quadro get regular updates for those who don’t/can’t customize the code?
3. What is the “Quality of life” for the printer? i.e., how long will support be available for this printer? For instance, Bambu Lab stopped support/ software updates for the X1 and P1 series just 5 years after it was released.
4. What do you guys plan on doing regarding the rising concerns of 3D printing regulations in certain areas of the US?
5. Are there any points of failure that we would need to worry about? For instance, belts breaking easily, or motors wearing out easily?
6. (feature suggestion) Would it be possible to make the spool holders have an RFID filament identifier like Bambu Lab and Creality’s filament identification system?
7. Will there be a mobile app allowing us to control our printer remotely?
8. What actions are there to prevent any type of ghosting/ ringing/ etc? I’ve seen Bambu Lab’s new A2L and their “anti vibration BB’s. Would something like that be an idea to consider?
9. Do y’all plan on producing a filament of your own? I noticed a “Co Print” logo on the side of the spools in the renderings, didn’t know whether that was a hint to anything.
10. I might’ve missed it in the article, but how easy is it to access and maintain the printer?
11. How moddable is the physical printer itself? Would y’all consider working with companies like BIQU to make “certified” upgrades, mods, etc. For the Quadro?
12. Will we be able to purchase any replacement parts from yalls store when the Quadro comes out?
13. What nozzle(s) will be used in the Quadro? Custom nozzle design? Hardened steel?
These are all the questions I can think of. I don’t mean to sound (”aggressively”) interrogative, I am merely trying to see if there are things other companies do/don’t do that could be implemented/fixed. I am looking forward to seeing this printer in action full-time!
I am SUPER excited for this printer! I’ve been looking at Bambu Lab printers for a while, but was being cautious as I didn’t want to spend my money on one just yet. After learning about you guys planning to make your own printer, I jumped right in to watch this progress. Although I am VERY excited about this printer, I do have a few questions:
1. How much time will it take to set up the printer?
2. Understanding that it is open source, will the Quadro get regular updates for those who don’t/can’t customize the code?
3. What is the “Quality of life” for the printer? i.e., how long will support be available for this printer? For instance, Bambu Lab stopped support/ software updates for the X1 and P1 series just 5 years after it was released.
4. What do you guys plan on doing regarding the rising concerns of 3D printing regulations in certain areas of the US?
5. Are there any points of failure that we would need to worry about? For instance, belts breaking easily, or motors wearing out easily?
6. (feature suggestion) Would it be possible to make the spool holders have an RFID filament identifier like Bambu Lab and Creality’s filament identification system?
7. Will there be a mobile app allowing us to control our printer remotely?
8. What actions are there to prevent any type of ghosting/ ringing/ etc? I’ve seen Bambu Lab’s new A2L and their “anti vibration BB’s. Would something like that be an idea to consider?
9. Do y’all plan on producing a filament of your own? I noticed a “Co Print” logo on the side of the spools in the renderings, didn’t know whether that was a hint to anything.
10. I might’ve missed it in the article, but how easy is it to access and maintain the printer?
11. How moddable is the physical printer itself? Would y’all consider working with companies like BIQU to make “certified” upgrades, mods, etc. For the Quadro?
12. Will we be able to purchase any replacement parts from yalls store when the Quadro comes out?
13. What nozzle(s) will be used in the Quadro? Custom nozzle design? Hardened steel?
These are all the questions I can think of. I don’t mean to sound (”aggressively”) interrogative, I am merely trying to see if there are things other companies do/don’t do that could be implemented/fixed. I am looking forward to seeing this printer in action full-time!